We have the gorgeous Tawny Frogmouth Owl on our property. He is so well disguised you are hard pressed to find him unless he moves. Now in the fabric & craft world one can see owls everywhere. So I decided that I wanted to make a cute owl heat pack for my grand daughters.

It is a hoot to sew this simple and absolutely adorable, microwavable owl heat pack. I played with various design concepts and each one was different from the preceding one. This owl has been strongly influences by Dustin Pike's cute digital clip art owls. To keep things nice and simple, this tutorial is the easiest version.

 I mostly used my machine for all stitching though I would hand sew the lot if I were traveling on the road, since it is a small project and I like hand sewing too - though my blanket stitch leaves a lot to be desired! LOL
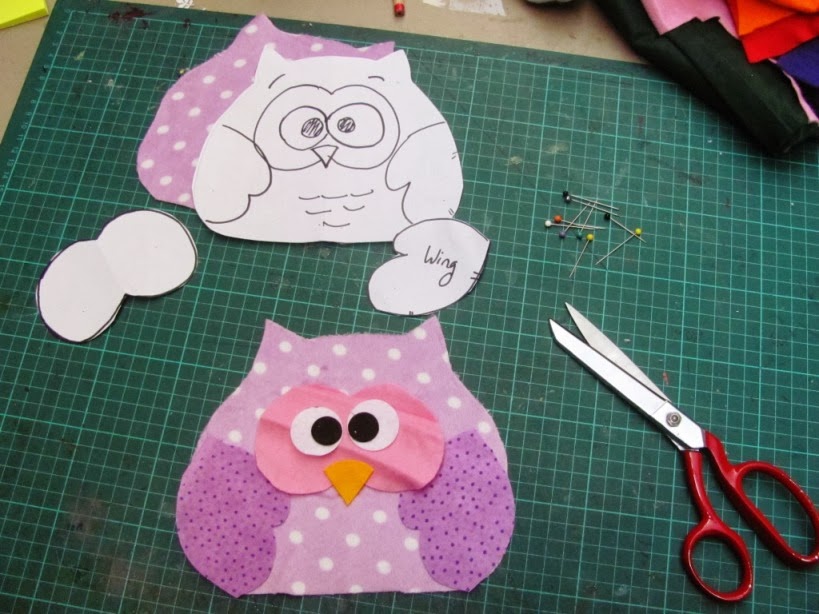
Cut a basic outline of the owl body shape with a 5mm (1/4 inch) seam allowance.*and then from a contrasting or coordinating fabric, cut 2 wing shapes.

Then from some felt remnants, draw a triangle for the nose and some circles for the eyes. *

Then the larger 'double circle' shape for the joined eye patch
 Right so that is all the material cut and ready for sewing now. Play around with placement and pin if desired.
 I need to go and wet and iron my pink eye patch - it just wont lay flat!
SEWING


Sew the larger 'double' eye in the same manner as the wings


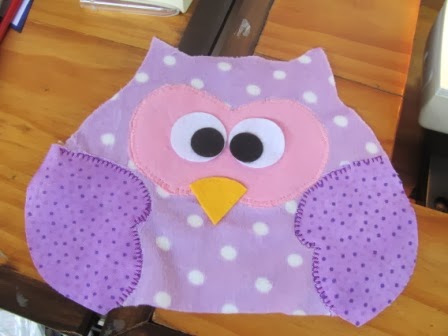
Since I have used felt I decided to glue the beak and the rest of the eyes. First I glued the beak and then the black pupil to the white of the eye. Before the final attachment of the eyes, I played around with a couple of different eye positions just for the fun of it. Which look do you like best. I think each changes the owl's expression!


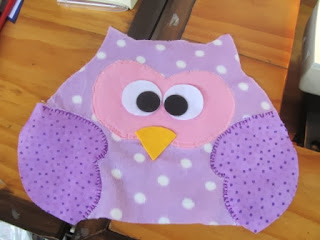
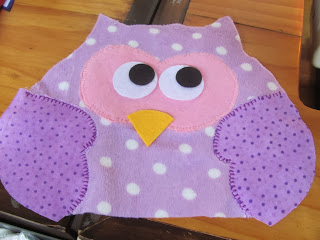
OK I decided he is going to be looking up! So I glue it on.
Now to the actual bag/body part First pin it right sides together. Don't worry about the wings hanging out as they do on mine.


Place right sides of the body together and stitch small straight stitches leaving a 5cm (2 inch) gap at the base. My machine is playing up and skipped a few stitches every now and then so I decided to sew around a second time as I certainly don't want any rice leaking out!!!


Now I like to clip the pointy ears to remove some of the bulk.

I also like to clip around the curves, even to removing little triangles in the seam to reduce the bulk. It is not strictly necessary, but it is what I like to do.

That's the machine sewing done. Now turn the bag right side out. I like to use a fat pen with the pen part wither retracted or removed to poke the ears out. I found a knitting needle more often poked a hole through the fabric for me.

Using a funnel for ease, add about 1 and a half cups of rice, or wheat and a tiny little of whichever flowers or herbs you would like to use.

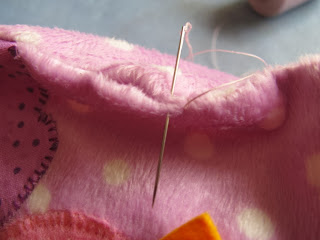
Hand sew shut the gap. And you are done.
It actually is slower taking all the photos and writing up the steps than it is to just get stuck into the job. It really is so simple and doesn't take much time at all.


** A Blind hemming stitch can resemble a hand sewn blanket stitch by altering the settings.
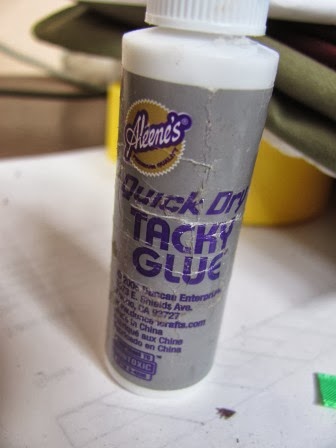
*** With felt and fleecy, you can avoid sewing by using a soft tacky glue such as Aleene's
Button Eyes?
I choose not to use buttons, firstly because my original owls went to very young children and I didn't want the risk of them choking on a button if it came off. Secondly, buttons are hard and uncomfortable in some positions when using a heat pack. Be especially aware of the googly eye type buttons as many of them are made from a soft plastic which could melt or worst in a microwave oven.
Stuffing:
I prefer rice to wheat as the heat material for the much lower allergen problems. Both are prone to absorbing moisture if in a high humidity environment. If this this the case then I suggest you make a cotton calico inner bag and then the outer owl. This way you can replace the inner bag and keep the decorative outer bag. I also like to add a sprig of lavender. You could add a variety of scents. Try a cinnamon stick for a spicy scent especially for a male recipient.
Of course you can turn this into a softie just by changing the filling from rice to fibrefill.
Feet?
On one owl, I added little ribbon feet before sewing the front and back together

This next one was my very first owl. Sewing the wings on like this was much more fiddly, but I really wanted to incorporate the hearts which were left overs from a skirt I had made recently for one of my grand daughters. The feet was pretty simple.

 I hope you can just click on the picture above and save it to your computer. Enlarge it to
fit on your page when printing. I had a go at embedding a PDF file, but I didn't like
the look on my blog post. Since it was my first attempt, maybe I did
something wrong. If this doesn't work for you then just send me a
message via email, Google+ or Facebook and I will send it to you by return email.)
I hope you can just click on the picture above and save it to your computer. Enlarge it to
fit on your page when printing. I had a go at embedding a PDF file, but I didn't like
the look on my blog post. Since it was my first attempt, maybe I did
something wrong. If this doesn't work for you then just send me a
message via email, Google+ or Facebook and I will send it to you by return email.)
I have entered this in my first craft linky party. When you click on that button it takes to the 'party' where lots of people are posting their crafty posts (and some yummy recipes) for the party.
I actually found another linky party, so here are the two parties. Please come and join me on the new adventure!


It is a hoot to sew this simple and absolutely adorable, microwavable owl heat pack. I played with various design concepts and each one was different from the preceding one. This owl has been strongly influences by Dustin Pike's cute digital clip art owls. To keep things nice and simple, this tutorial is the easiest version.
Owl heat pack tutorial

Materials I used:
- 2 larger scraps of material approx 20 x 20cm each (8 x 8 inch). I used a minky type fabric for this tutorial, though my other ones have been made from fine pin-whale corduroy. Duck, ticking and most tightly woven cotton materials would be best. Fleecy works well too.
- Felt scraps for the eyes and beak. A few of my owls had the eyes made from scrap materials too!
- Aleene's Tacky Glue
- 1 1/2 cup rice
- 1 sprig of lavender (optional and interchangeable with other scents though not many flowers work well unless pre-dried.
- A funnel was handy.
- Pattern: See the end of the post for the free pattern.
Instructions:
CUTTINGCut a basic outline of the owl body shape with a 5mm (1/4 inch) seam allowance.*and then from a contrasting or coordinating fabric, cut 2 wing shapes.

Then from some felt remnants, draw a triangle for the nose and some circles for the eyes. *

Then the larger 'double circle' shape for the joined eye patch

SEWING


Sew the larger 'double' eye in the same manner as the wings


Since I have used felt I decided to glue the beak and the rest of the eyes. First I glued the beak and then the black pupil to the white of the eye. Before the final attachment of the eyes, I played around with a couple of different eye positions just for the fun of it. Which look do you like best. I think each changes the owl's expression!


 |
| He is getting dizzy with all the changes - LOL |

Now to the actual bag/body part First pin it right sides together. Don't worry about the wings hanging out as they do on mine.


Place right sides of the body together and stitch small straight stitches leaving a 5cm (2 inch) gap at the base. My machine is playing up and skipped a few stitches every now and then so I decided to sew around a second time as I certainly don't want any rice leaking out!!!


Now I like to clip the pointy ears to remove some of the bulk.

I also like to clip around the curves, even to removing little triangles in the seam to reduce the bulk. It is not strictly necessary, but it is what I like to do.


Using a funnel for ease, add about 1 and a half cups of rice, or wheat and a tiny little of whichever flowers or herbs you would like to use.

Hand sew shut the gap. And you are done.

It actually is slower taking all the photos and writing up the steps than it is to just get stuck into the job. It really is so simple and doesn't take much time at all.

To use:
Microwave for 1 minute and then in 10 second increments until your owl is nice and warm. Be careful not to microwave for any longer than 3 minutes as it will overheat.
Hints:
* I have a PDF pattern you are free to use to your hearts content with no restrictions other than no direct use of pattern on your blog or other media but feel free to link back or sew and sell finished owls anywhere.** A Blind hemming stitch can resemble a hand sewn blanket stitch by altering the settings.
*** With felt and fleecy, you can avoid sewing by using a soft tacky glue such as Aleene's
 |
| Machine sewing the eyes - just take it slow and turn constantly |
Variations:
You could stitch the body around the edges on the outside instead (and avoid the turning bit) for a more rustic look. You will still need to leave a gap at the bottom for the filling before continuing with the sewing. Be aware some fabrics will fray more than others, for some that is part of the charm. You could also cut the shapes with a pinking shears which will reduce a lot of the fraying.Button Eyes?
I choose not to use buttons, firstly because my original owls went to very young children and I didn't want the risk of them choking on a button if it came off. Secondly, buttons are hard and uncomfortable in some positions when using a heat pack. Be especially aware of the googly eye type buttons as many of them are made from a soft plastic which could melt or worst in a microwave oven.
Stuffing:
I prefer rice to wheat as the heat material for the much lower allergen problems. Both are prone to absorbing moisture if in a high humidity environment. If this this the case then I suggest you make a cotton calico inner bag and then the outer owl. This way you can replace the inner bag and keep the decorative outer bag. I also like to add a sprig of lavender. You could add a variety of scents. Try a cinnamon stick for a spicy scent especially for a male recipient.
Of course you can turn this into a softie just by changing the filling from rice to fibrefill.
Feet?
On one owl, I added little ribbon feet before sewing the front and back together

 |
| See his little feet poking out? |


I have entered this in my first craft linky party. When you click on that button it takes to the 'party' where lots of people are posting their crafty posts (and some yummy recipes) for the party.
I actually found another linky party, so here are the two parties. Please come and join me on the new adventure!
Cute owl! And it's a heat pack! Wow! I could really use one of those right now. Great job!
ReplyDeleteNavy Wifey Peters @ Submarine Sunday Link Party
Thanks, I loved the ric rac detailing on yours owls too.
DeleteWow, that's so adorable, will make it for my granddaughters, thanks so much for the inspiration.
ReplyDeletebingöl
ReplyDeleteelazığ
hakkari
sakarya
erzincan
BJZ6QY
elazığ
ReplyDeletegümüşhane
kilis
siirt
sakarya
2PO
görüntülü
ReplyDeleteucretli show
8RA11
görüntülüshow
ReplyDeleteücretli show
MKPP
denizli evden eve nakliyat
ReplyDeletekars evden eve nakliyat
çorum evden eve nakliyat
kars evden eve nakliyat
malatya evden eve nakliyat
İ17SNQ
hatay evden eve nakliyat
ReplyDeleteısparta evden eve nakliyat
erzincan evden eve nakliyat
muğla evden eve nakliyat
karaman evden eve nakliyat
A7O
F67DE
ReplyDeleteKütahya Evden Eve Nakliyat
Kilis Şehirler Arası Nakliyat
Mardin Şehirler Arası Nakliyat
Rize Lojistik
Adıyaman Şehirler Arası Nakliyat
Hatay Evden Eve Nakliyat
Kırşehir Şehir İçi Nakliyat
Maraş Parça Eşya Taşıma
Giresun Lojistik
68D4C
ReplyDeleteNiğde Evden Eve Nakliyat
Çerkezköy Organizasyon
Arg Coin Hangi Borsada
İzmir Lojistik
Isparta Evden Eve Nakliyat
Kırşehir Evden Eve Nakliyat
Ankara Boya Ustası
Ankara Fayans Ustası
Balıkesir Parça Eşya Taşıma
7F65C
ReplyDeleteÇerkezköy Bulaşık Makinesi Tamircisi
Trabzon Şehirler Arası Nakliyat
Gate io Güvenilir mi
Muğla Şehirler Arası Nakliyat
Etimesgut Parke Ustası
İstanbul Evden Eve Nakliyat
Artvin Şehirler Arası Nakliyat
Kilis Şehirler Arası Nakliyat
Ardahan Evden Eve Nakliyat
1B277
ReplyDeleteNevşehir Şehirler Arası Nakliyat
Muş Parça Eşya Taşıma
Bayburt Parça Eşya Taşıma
Kırıkkale Lojistik
Batıkent Parke Ustası
Ardahan Parça Eşya Taşıma
Erzincan Evden Eve Nakliyat
Çanakkale Şehir İçi Nakliyat
Pursaklar Boya Ustası
970ED
ReplyDeleteÜnye Asma Tavan
Yozgat Şehir İçi Nakliyat
Silivri Duşa Kabin Tamiri
Balıkesir Şehir İçi Nakliyat
Bitfinex Güvenilir mi
Bitcoin Nasıl Alınır
Muş Şehir İçi Nakliyat
Batman Şehirler Arası Nakliyat
Eryaman Fayans Ustası
216D9
ReplyDeleteReferans Kimliği Nedir
Tekirdağ Fayans Ustası
Etlik Parke Ustası
Niğde Evden Eve Nakliyat
Ünye Asma Tavan
Siirt Evden Eve Nakliyat
Muş Evden Eve Nakliyat
Rize Evden Eve Nakliyat
Çankaya Parke Ustası
EAA2A
ReplyDeleteYeni Çıkan Coin Nasıl Alınır
Binance Nasıl Kayıt Olunur
Bitcoin Nasıl Kazanılır
Kripto Para Madenciliği Siteleri
Coin Madenciliği Siteleri
Coin Üretme Siteleri
Bitcoin Yatırımı Nasıl Yapılır
Binance Ne Zaman Kuruldu
https://resimlimag.net/
D7383
ReplyDeleteBitcoin Üretme Siteleri
Kripto Para Çıkarma Siteleri
Coin Nasıl Kazılır
Kripto Para Nasıl Alınır
Binance Hangi Ülkenin
Coin Para Kazanma
Gate io Borsası Güvenilir mi
Binance Ne Kadar Komisyon Alıyor
Kripto Para Nedir
2BC42
ReplyDeletebinance referans kodu
resimli magnet
binance referans kodu
referans kimliği nedir
referans kimliği nedir
resimli magnet
resimli magnet
binance referans kodu
binance referans kodu
076F7
ReplyDeleteamiclear
5C116
ReplyDeletebatman parasız sohbet
yabancı görüntülü sohbet
hakkari canlı sohbet
kastamonu görüntülü sohbet yabancı
balıkesir sesli sohbet uygulamaları
görüntülü sohbet kadınlarla
yalova rastgele sohbet odaları
yabancı canlı sohbet
kütahya telefonda kızlarla sohbet
0C505
ReplyDeletekonya telefonda kadınlarla sohbet
karabük görüntülü sohbet odaları
uşak ücretsiz görüntülü sohbet uygulamaları
istanbul en iyi görüntülü sohbet uygulaması
tekirdağ rastgele görüntülü sohbet
tekirdağ kadınlarla ücretsiz sohbet
bingöl yabancı görüntülü sohbet siteleri
şırnak canlı görüntülü sohbet
denizli rastgele sohbet siteleri
995C0
ReplyDeletebitlis canlı sohbet et
kadınlarla sohbet et
elazığ görüntülü sohbet kızlarla
ankara ücretsiz sohbet siteleri
adıyaman canlı görüntülü sohbet
agri yabancı görüntülü sohbet siteleri
sesli sohbet sitesi
parasız sohbet
şırnak sesli sohbet uygulamaları
90B0A
ReplyDeleteBitcoin Para Kazanma
Telegram Abone Satın Al
Binance Referans Kodu
Coin Nasıl Çıkarılır
Okex Borsası Güvenilir mi
Gate io Borsası Güvenilir mi
Clysterum Coin Hangi Borsada
Kripto Para Çıkarma Siteleri
Bitcoin Nasıl Para Kazanılır
67F73
ReplyDeleteraydium
ellipal
ledger desktop
galagames
ledger wallet
shiba
quickswap
eigenlayer
yearn
12D92
ReplyDeletekaldıraç nasıl yapılır
4g proxy
ilk kripto borsası
papaya meyvesi
bibox
kripto ne demek
paribu
filtre kağıdı
filtre kağıdı
F2467
ReplyDeletecoinex
kaldıraç ne demek
kucoin
bkex
kraken
en az komisyon alan kripto borsası
bitcoin hesabı nasıl açılır
bitrue
huobi
EFEF9
ReplyDeletebitcoin hangi bankalarda var
en iyi kripto para uygulaması
gate io
okex
binance 100 dolar
btcturk
bybit
en eski kripto borsası
sohbet canlı
22C93
ReplyDeleteAugust 2024 Calendar
4g proxy
bitcoin hesabı nasıl açılır
referans kimliği nedir
bitget
4g mobil proxy
bitcoin haram mı
canli sohbet
March 2024 Calendar
3FC37
ReplyDeleteadwords kupon satışı
adwords hesap satışı
forum
takipçi satın al instagram
Twitter Para Kazanma
Youtube Beğeni Satın Al
beğeni satın al tiktok
abone satın al youtube
Youtube Abone Satın Al
FBHFGH
ReplyDeleteصيانة افران الغاز بمكة
THFBGTGHNJY
ReplyDeleteتسليك مجاري
tryyjyjnyukjkiuik
ReplyDeleteعزل اسطح بالقطيف
شركة عزل اسطح بالاحساء
ReplyDeleteشركة عزل بالاحساء
تنظيف مجالس GKmromcskd
ReplyDeleteشركة عزل اسطح بالاحساء 7GjhELChWo
ReplyDeleteشركة مكافحة النمل الابيض VypjCrnqCg
ReplyDeleteشركة مكافحة حشرات بالهفوف fuDgydkp98
ReplyDeleteشركة تنظيف شقق بالجبيل xbzL6BbjLL
ReplyDeleteشركة تنظيف شقق بجازان oM0apunBOy
ReplyDeleteشركة تنظيف شقق بجازان XIu1nojsl8
ReplyDeleteHi, Thanks for sharing this excellent Blog with us.Keep doing good work.
ReplyDelete93DA343838
ReplyDeleteŞinasi Hangi Romanın Kahramanı
Viking Rise Hediye Kodu
Selim Hangi Romanın Kahramanı
Kanlı Divane Hikayesi
Doğadaki Fraktal Örnekleri
Whiteout Survival Hediye Kodu
Brawl Stars Elmas Kodu
Berivan Çiçeği Hikayesi
Kamçatka Nerede
7436E76B82
ReplyDeleteAnadoluslot Güncel Adres
Anadoluslot
Anadoluslot
Anadoluslot
Trwin
Trwin Giriş
Trwin
Trwin
Trwin
66E7E55432
ReplyDeleteuygun instagram takipçi
tiktok beğeni satın al
aktif takipçi
gerçek takipçi
gerçek takipçi