Mulberries are a wonderful tree to have in an out of the way part of the garden. Hang on, I can almost hear you saying! Why out of the way? Well the down side is that they drop a lot of fruit and this can stain concrete, pavers etc. I haven't any problems with birds eating then pooping stains on my clothes line and it is only 10m from my line, but I have read about it as a complaint for some.
 |
| I just have to eat some along the way as I collect some for the table. |
Mulberries are wonderfully healthy for you as they contain significant amounts of Vitamin C and K, Vitamins E, B6, Thiamin, Riboflavin, and Niacin. They also contain a decent amount of iron, minerals, protein, fibre and even Omega-6 fatty acids. Mulberries contain high levels of reserveratrol, which is the same powerful antioxidant that is found in the skin of red grapes and red wine. Reserveratrol helps to prevent cellular damage by free radicals, reduces the growth of cancer cells, is good for maintaining a healthy heart and promotes longevity. Mulberries have been used medicinally by many cultures, especially the Chinese, to strengthen the kidneys, help with weakness and fatigue, reverse premature gray hairs, balance out blood sugar levels, promote restful sleep and to calm the mind. (Some of this is copied from http://www.healthyreader.com/wild-mulberries/ since I have no medical training what so ever.)
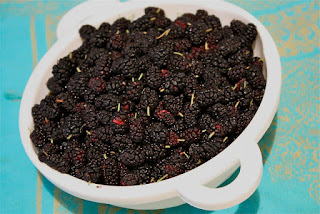 |
| A bowl full of delicious Mulberries |
They are sweet and rather mild tasting. I love to eat them fresh as well as to cook desserts with them. Others I know make jam but I never remember to collect jars.
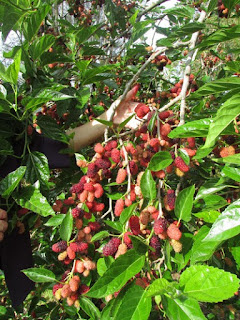 |
| These need a few more days before they ripen to dark purple black |
Picking mulberries is very easy. You almost only have to touch the ripe berries and they will just about fall off with very little effort in your bowl. Ripe mulberries are dark purple, almost black. The under-ripe ones will have some red or pink and are little too tart for eating fresh off the tree. They wont continue to ripen. This year we had an extraordinary bumper crop. In just one day I collected 2.5 kg and that was only half the tree and the tree didn't even look like I had taken any berries off it.
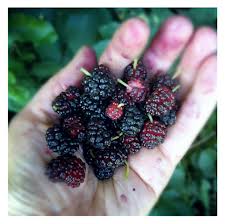 |
| Just a teeny handful |
This was how I came to realize that there was a super easy way to get my berries. Since the ripe ones drop off so easily and you will have them fall onto the ground sometimes before you can get your hand there to catch it. So I thought I would grab a large but old bed sheet that I was keeping for a paint drop sheet and place that sheet under the branches I was working on. All I had to do then was wiggle the branches and most of the rip berries would drop onto my sheet. A few not so ripe berries would fall too, but they are easy to spot and I popped these into the compost. If they are just a it under ripe you can still use these in cooking allowing for the tartness.
 |
| Note the sheet on the ground. I also garden in my old cut off jeans |
Mulberries have a very short shelf life. If eating fresh, they are best consumed within 24 hours else they go mushy and mouldy. Mulberries are
fabulous for freezing. Rinse them if you desire, however since I never spray my garden, I tend to spread a single layer of berries on a cookie tray and freeze them whole. When they are frozen then I scoop them into zip lock bags as they will separate easily into the quantities you desire. They will defrost all soft and mushy ready for use.
Try these wonderful mulberry recipes: My husbands' favourite is a
Mulberry Pie. My favourite is some
super tasty and light mulberry muffins. My daughter tends to add them to her healthy smoothie and my son adds them to his breakfast yoghurt. My sister in law just sent me a recipe for making a mulberry sorbet, so guess what I will be trying next?
 |
| Mulberry parfait. |
Did you know that you will also get a smaller second crop when autumn comes around?
So what's your favourite berry recipe?


